
Overview
Payment Schedules allow you to automatically charge a customer on a recurring basis.
You can configure the amount, frequency, duration, and receipt preferences when creating a schedule.
How To Create a Payment Schedule
Step 1
Log in to your Biller Genie account.
From the main menu, navigate to:
Reports > Schedules
Click Create Schedule.
Step 2
Begin typing the name of the customer.
As you type, the customer’s name will auto-populate in the dropdown menu.
Select the appropriate customer.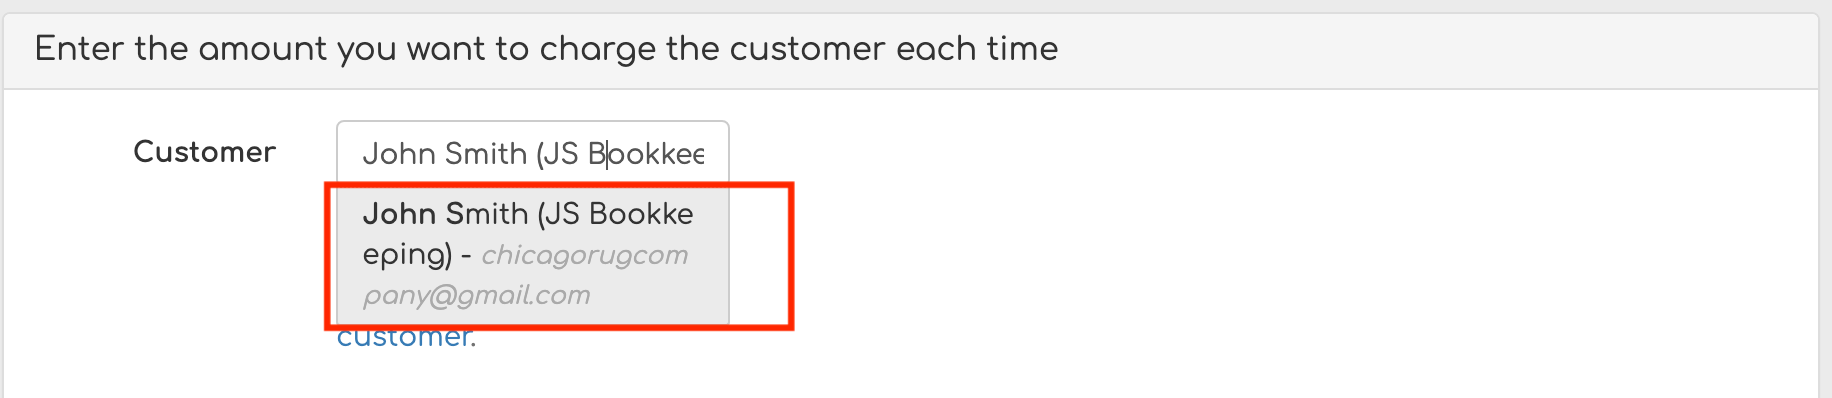
Step 3
Choose the preferred Payment Method for the schedule.
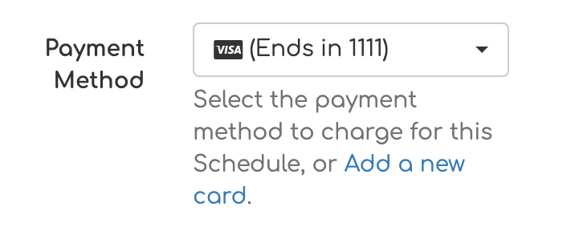
Enter the Payment Amount that will be charged each time the schedule runs.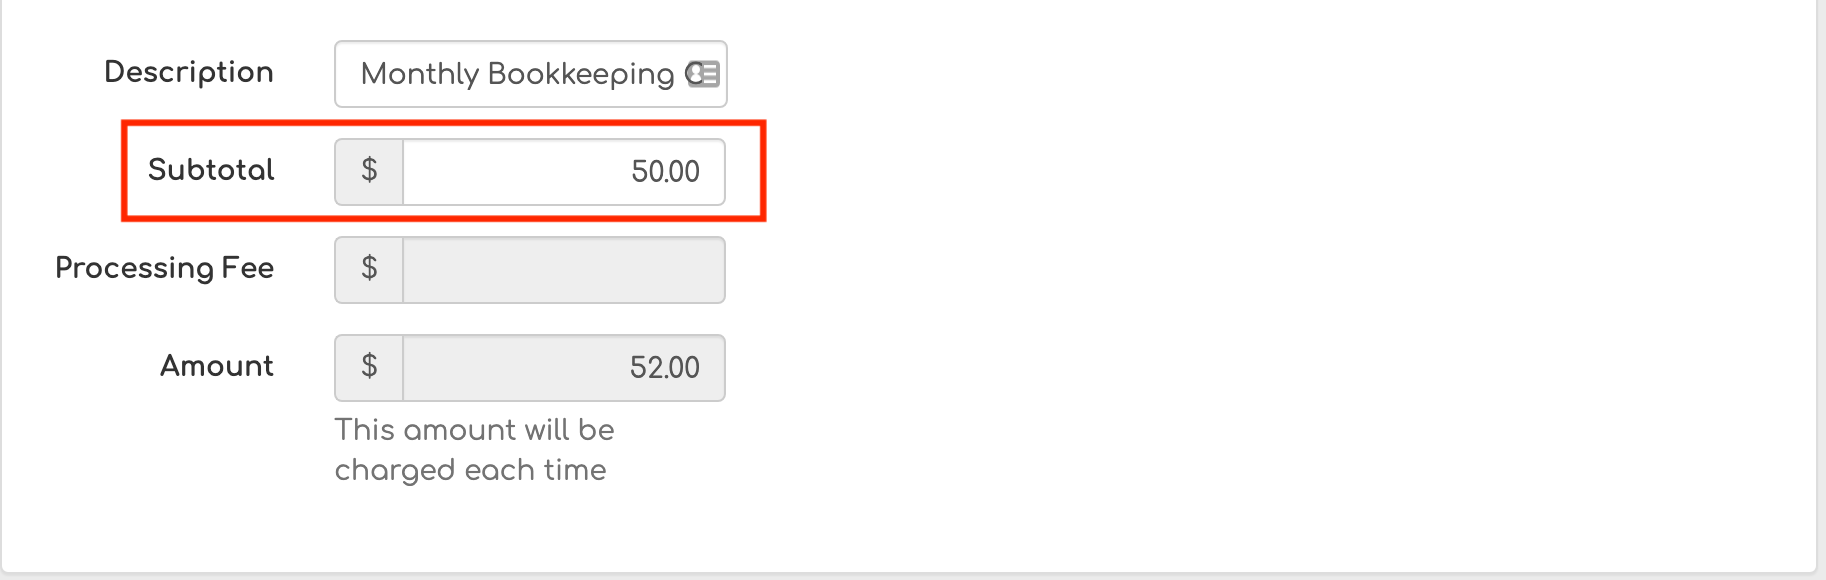
Step 4
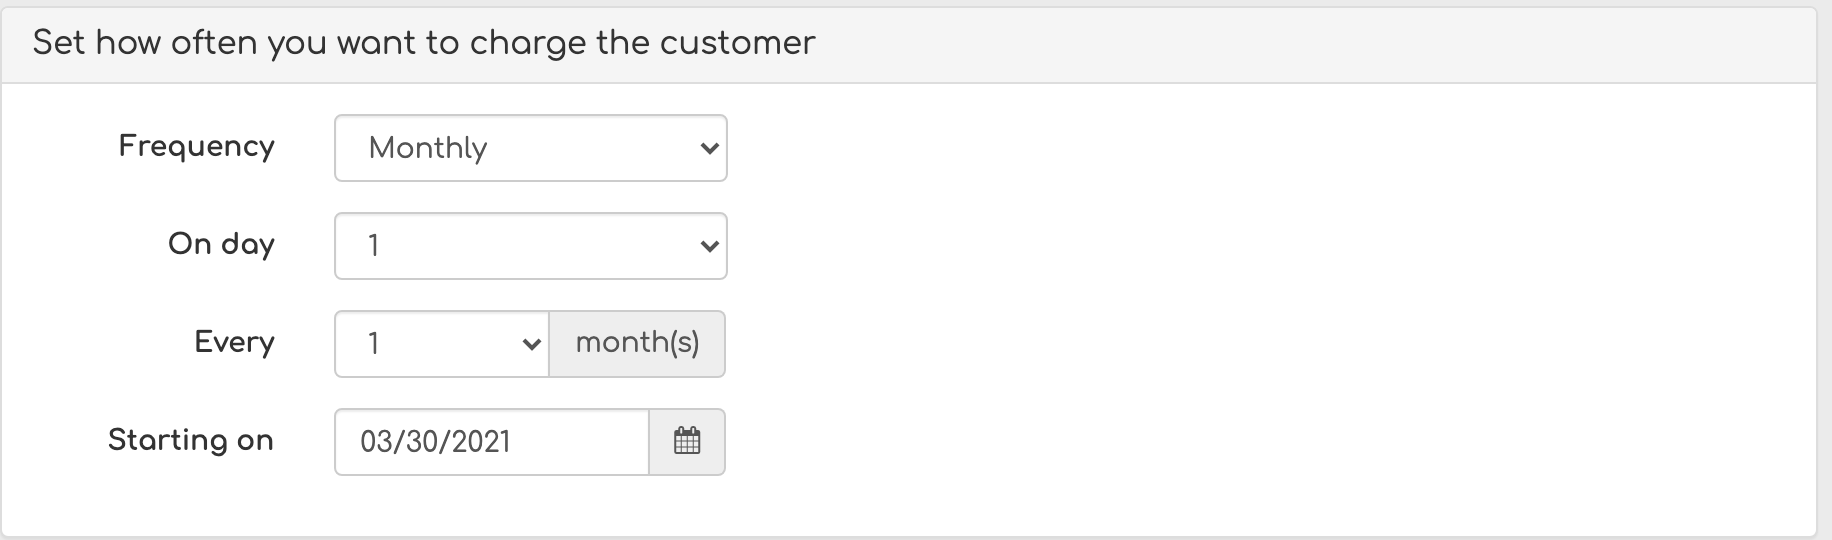
Select the Frequency of the charge.
Examples include:
- Daily
- Weekly
- Monthly
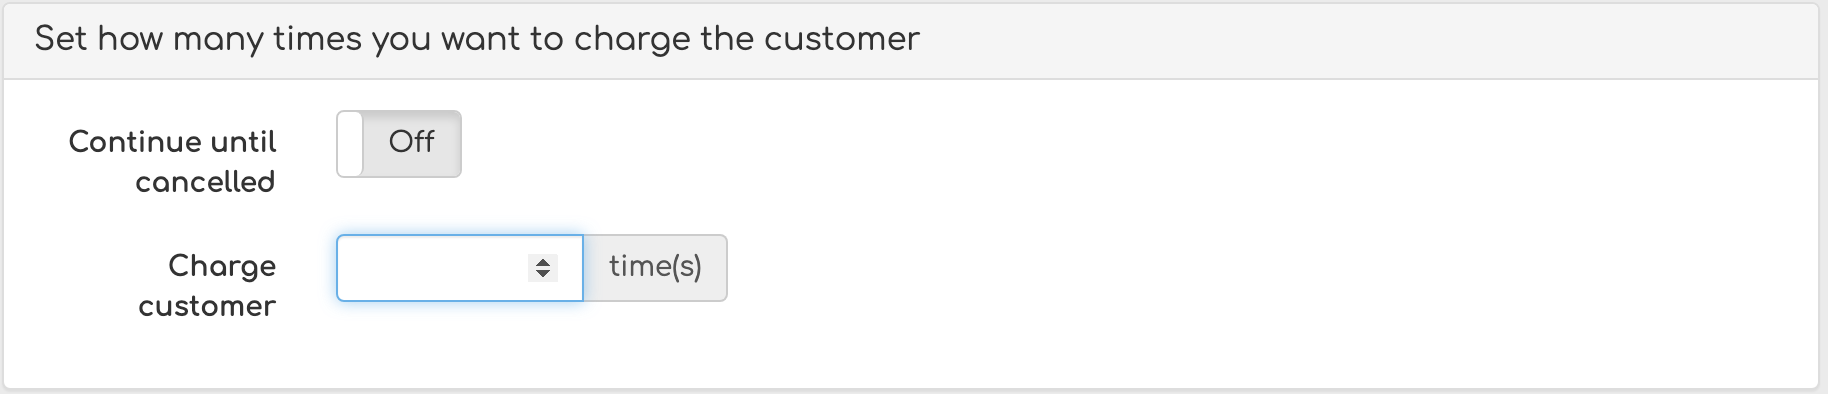
Step 5
Set the Duration of the schedule.
You can choose to:
- Continue charging until the schedule is manually canceled
- Charge a specific number of times
Step 6
Configure receipt preferences.
Toggle receipt settings from Off to On if you would like:
- The merchant to receive a receipt
- The customer to receive a receipt
Once all fields are completed, select Create Schedule to activate it.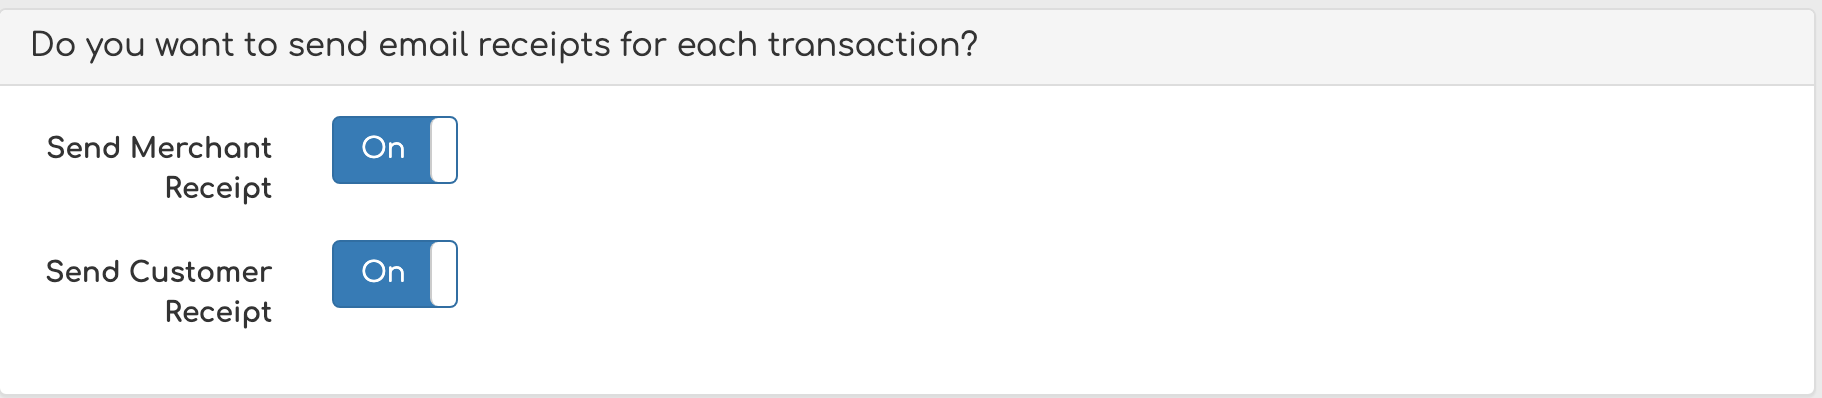
Important Notes
- The customer must have a valid stored payment method on file before creating a recurring schedule.
- Schedules can be edited or canceled at any time from the Schedules section.
- Ensure the correct payment method is selected before saving.
Still Having Trouble?
If you are unable to create a payment schedule, contact the Biller Genie support team at support@billergenie.com and include the following details:
- Customer name
- Payment method selected
- Frequency and amount
- Any error messages displayed
Providing this information will help our support team assist you as efficiently as possible.