Migrating from QB Desktop to QB Online (Web Connector)
Move from QB Desktop to QB Online and take your existing Biller Genie account with you
Table of Contents
When you are ready to upgrade to QuickBooks Online, you can take your existing Biller Genie account with you, provided you make the upgrade in a specific sequence.
If you haven't created your QuickBooks Online account yet, create it here.
WARNING!
BEFORE PROCEEDING, ENSURE THAT YOUR QUICKBOOKS DESKTOP FILE IS FULLY SYNCED WITH BILLER GENIE AND YOUR LAST SYNC DATE IS CURRENT AND UP TO DATE
WARNING!
Performing these steps out of order could result in needing to create a new Biller Genie account and result in a loss of data.
Any data in the QB Online account (customers, items, invoices, etc) will be overwritten by the data transfer from QB Desktop. Please start with a blank QBO account or back up any needed data.
This migration process will be completed in two parts:
Part A: Migrating from QB Desktop to QB Online.
Part B: Connecting Biller Genie to the new QB Online account.
Part A: Migrating from QB Desktop to QB Online
Step 1
In the Biller Genie portal, run a final sync between your Biller Genie account and QuickBooks Desktop.
This step is important to make sure all data between Biller Genie and QB Desktop is fully in sync

Step 2
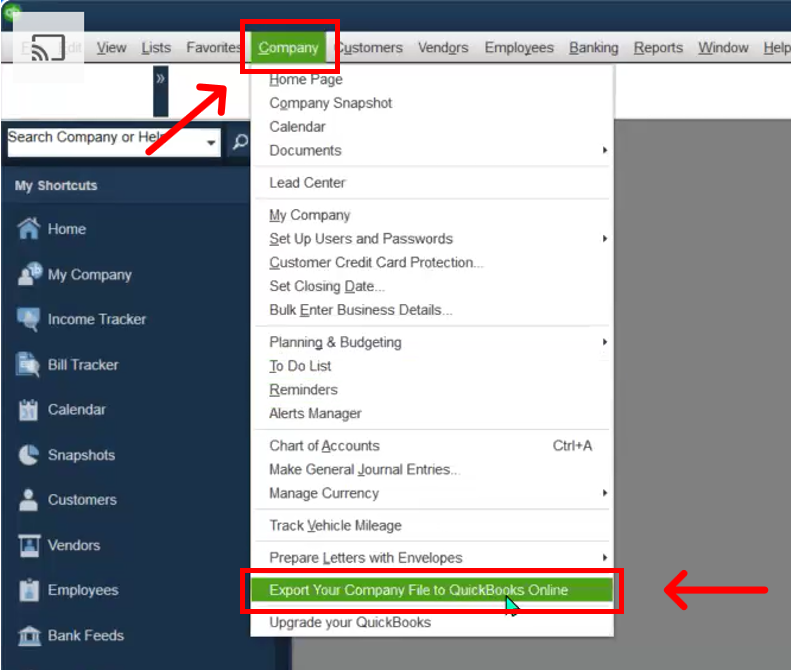
In QuickBooks Desktop, go to Company > Export your Company File to QuickBooks Online
Step 3
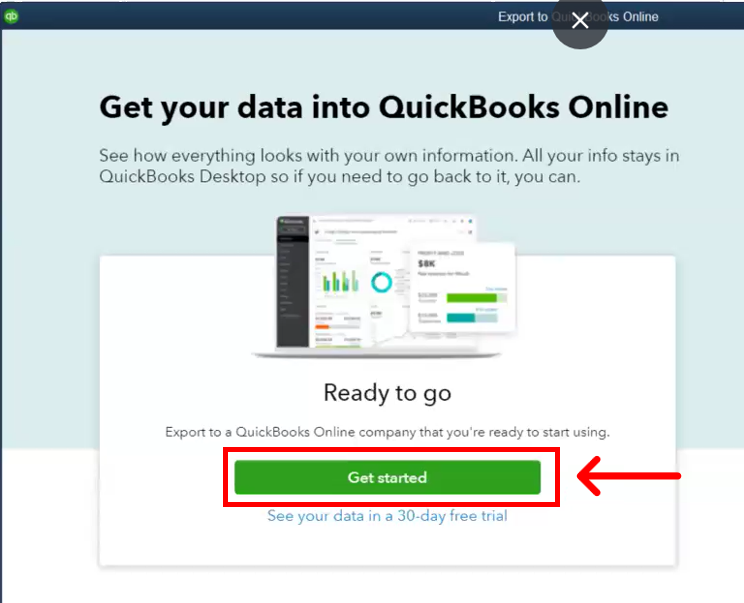
Click Get Started
Step 4
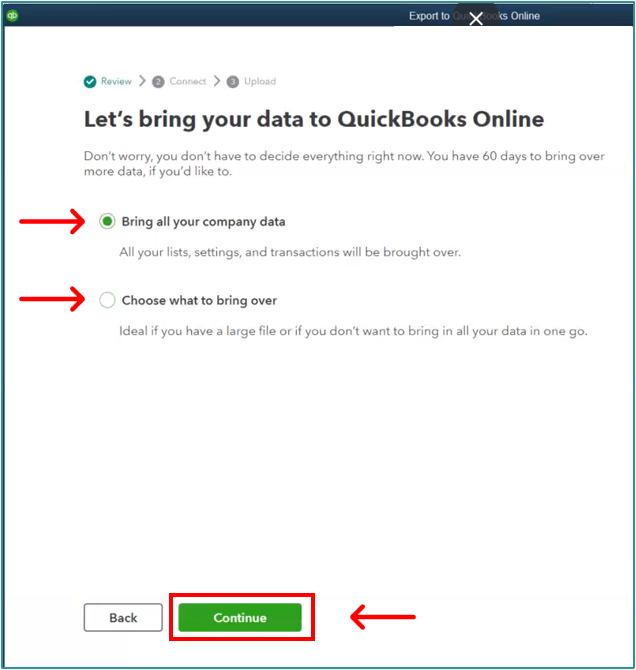
Select one of the available options
A. "Bring all your company data"
B. "Choose what to bring over"
Click Continue
Step 5
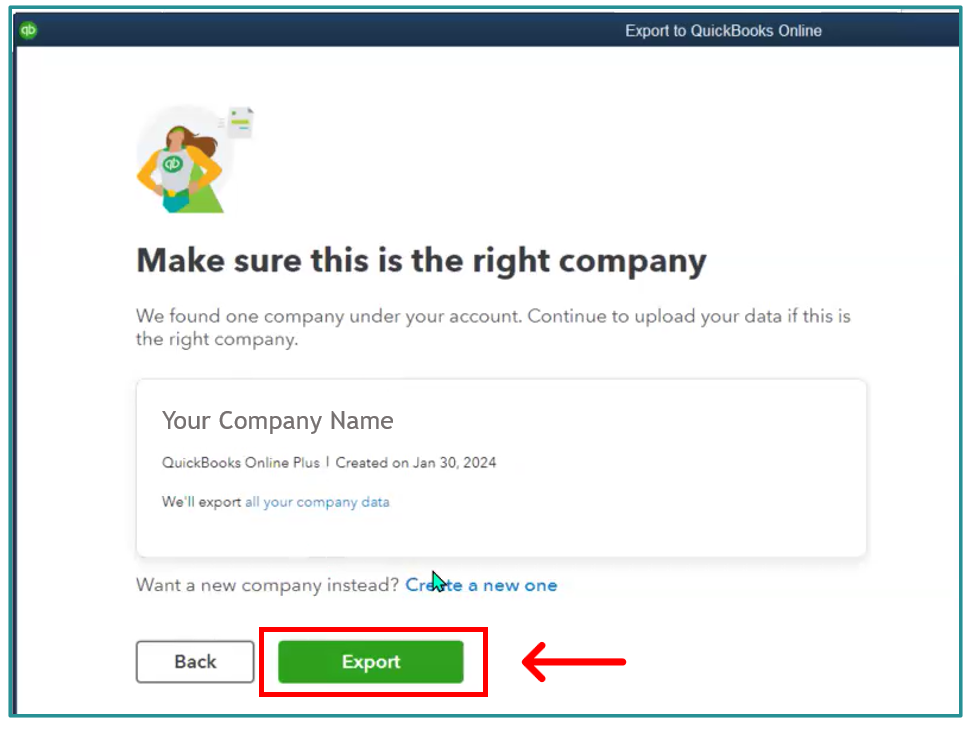
Your new QuickBooks Online account should be displayed here.
Click Export
Step 6
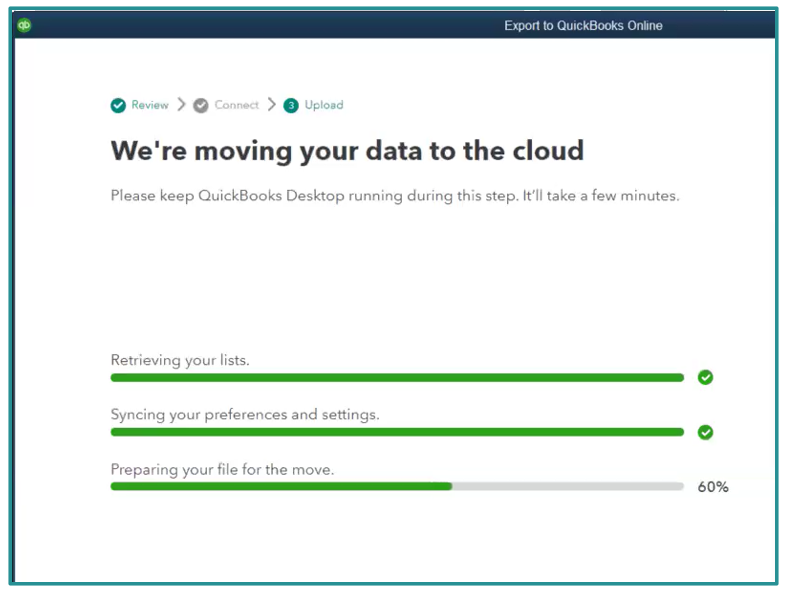
Wait for the import process to complete
Step 7
Check your inbox for a confirmation email from do_not_reply@intuit.com.
Click the green link in the email, titled “Complete your setup”
Step 8
The email link will take you to your new QuickBooks online account and display the final status of your account migration.
This completes Part A.
Part B: Connecting Biller Genie to QB Online
WARNING!
BEFORE PROCEEDING: We strongly recommend that you turn off Invoice Messenger and Reminders before connecting your QB Online account. After connecting and running a sync, you can safely turn the setting back on. This will prevent to possibility of sending out unnecessary notifications on older invoices that will likely sync over in the process
Step 1
In the Biller Genie Portal, click Add-ons > QuickBooks Deskop

Step 2
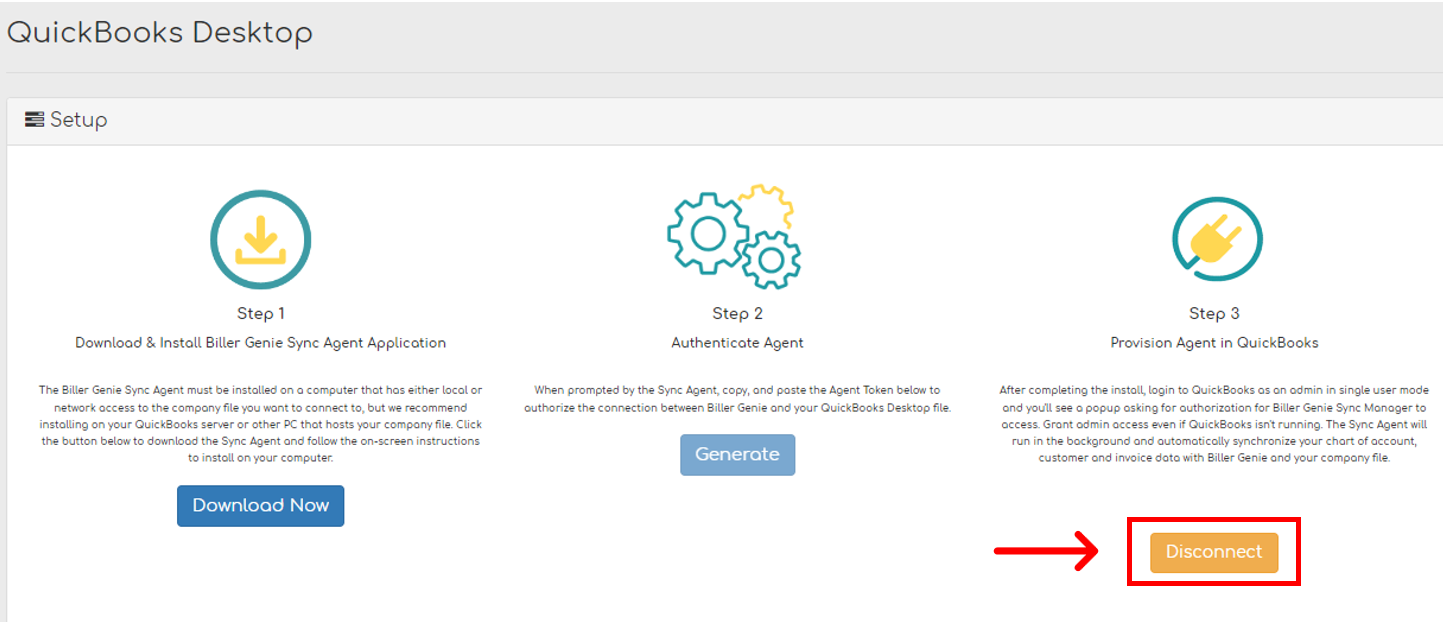
Click Disconnect from QuickBooks
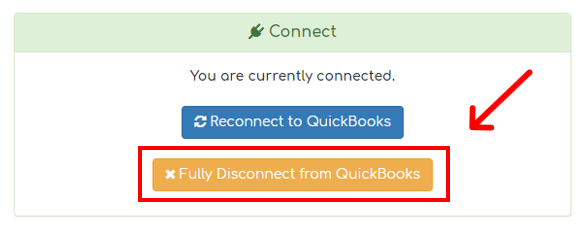
Your screen will look like one of the options below, depending on what version you have:

Step 3
Click Fully Disconnect from QuickBooks or Yes, depending on your version

Step 4
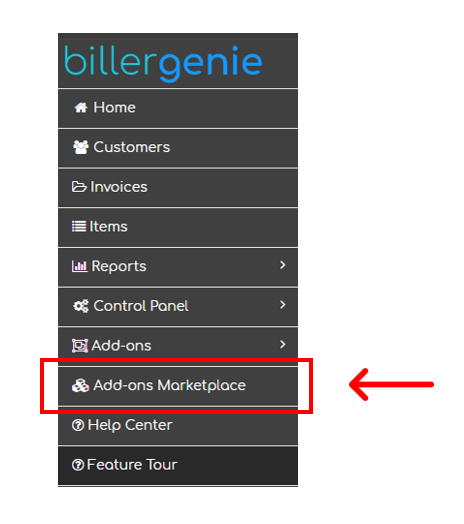
Navigate to the Add-ons Marketplace
Step 5
Click the Accounting Software category or search “QuickBooks”
Click the tile for QuickBooks Desktop that shows “Installed”

Step 6
Click Uninstall

Step 7
Confirm the action by clicking Uninstall again

Step 8
Click either link to return to the Marketplace
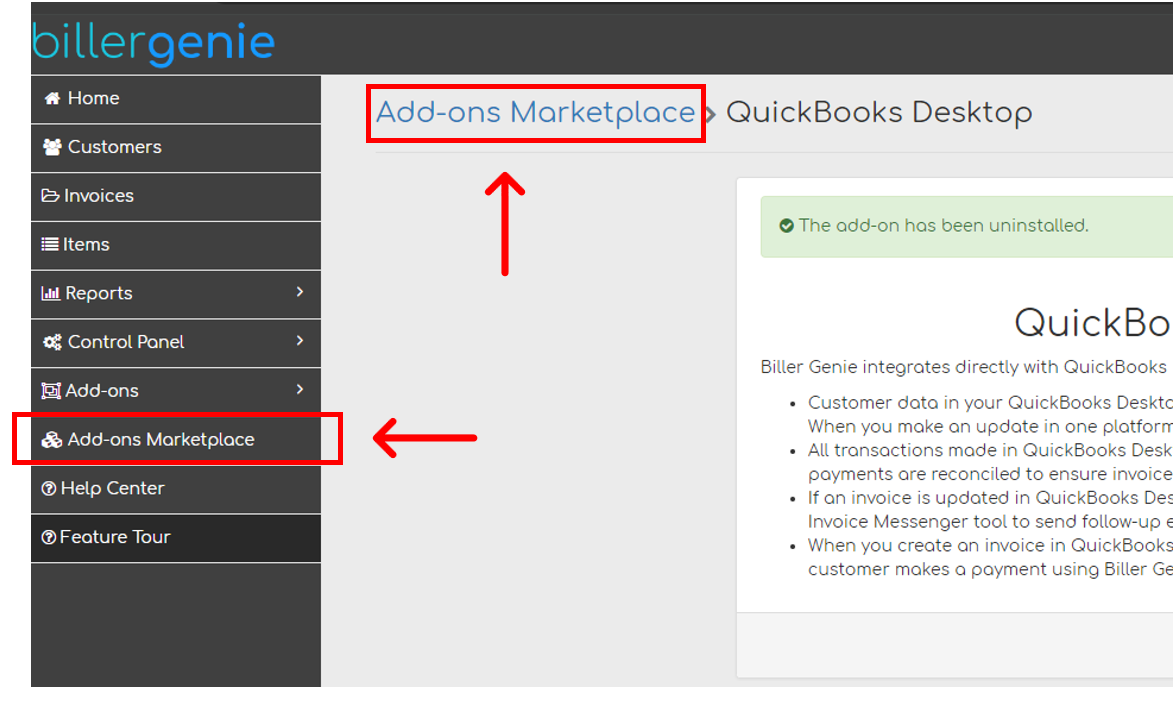
Step 9
Click the Accounting Software category or search “QuickBooks”
Click the tile for QuickBooks Online

Step 10
Click Install

Step 11
Click Connect to QuickBooks

Step 12
Read the QuickBooks Desktop to Online Migration warning and click the checkbox to confirm your company file migration
Click Continue to Connect

Step 13
Enter your Intuit/QuickBooks Online login
If you are already signed in on a different browser or tab, proceed to step 13

Step 14
Click the Search for a company or firm dropdown and select the recently migrated company file
Click Next

Step 15
Click Connect to give QuickBooks permission to connect with Biller Genie

Step 16
You will be taken to your Biller Genie account, where you will see a sync has been initiated.
Once the sync is complete, you will see status of Successful
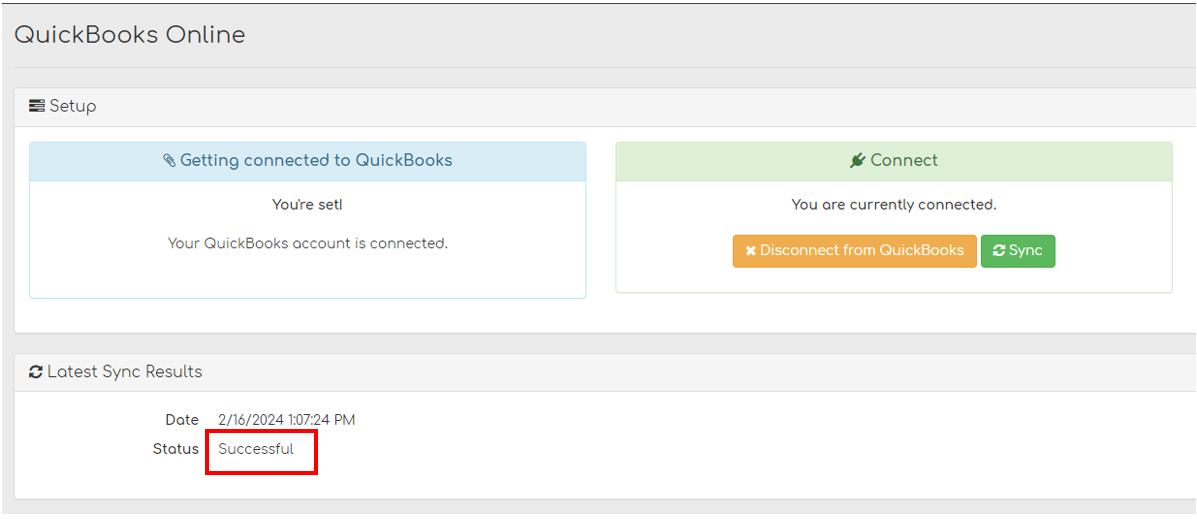
Your Biller Genie account is now connect to QB Online!