Installing QuickBooks Desktop (for Versions 2021 R4 & Later)
Table of Contents
Step 1
Log into the Biller Genie merchant portal.
Step 2
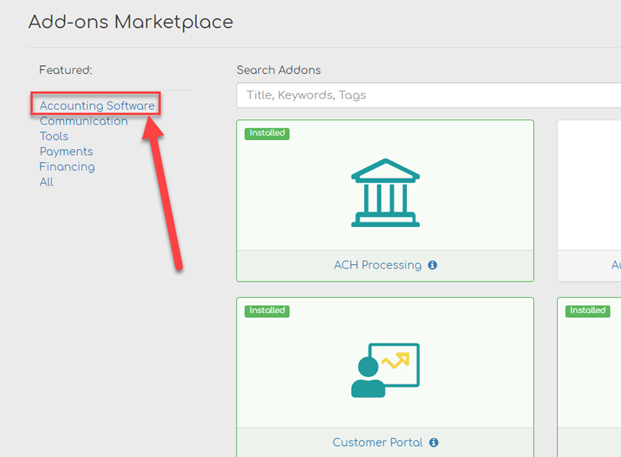
Click on Add-ons Marketplace in the left side menu.
Step 3
Click Accounting Software in the feature list on the left.
Step 4
Click the tile for QuickBooks Desktop.

Step 5
Click Install

Step 6
Once the app is installed in Biller Genie, log into QuickBooks Desktop as the admin user in single user mode on the computer where the company file is stored.
See Appendix A. which shows how to confirm single-use mode is being used.
Step 7
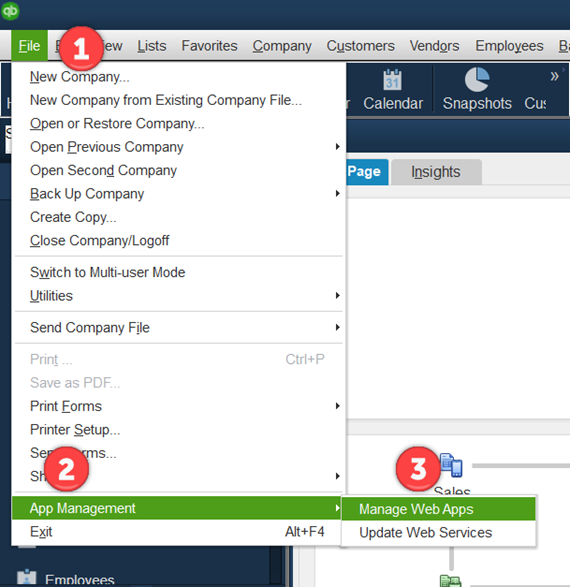
In QuickBooks Desktop click the “File” menu in the upper left corner, from there click “App Management” towards the bottom, and then click “Manage Web Apps”.
Step 8
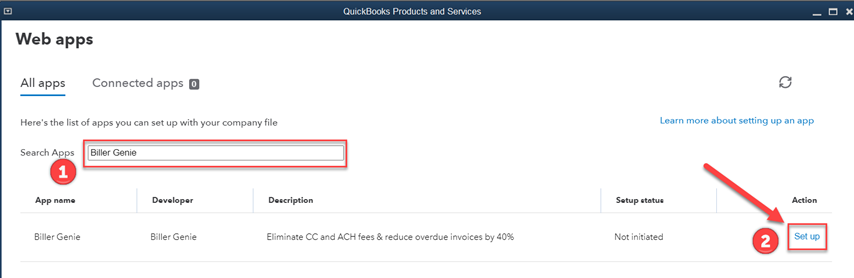
Now that the “Web Apps” screen is open, in the search apps field, type Biller Genie. Once the Biller Genie Web app is shown on the list, click “Set Up” on the right side.
Step 9
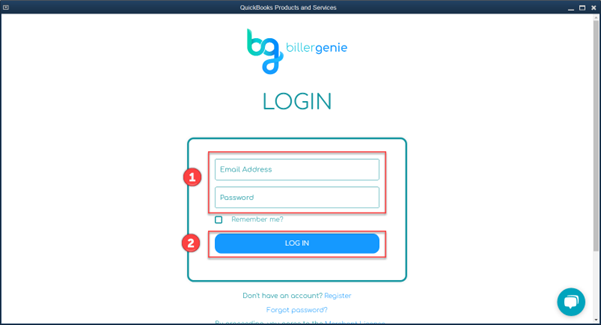
Once the screen loads, a prompt to log into Biller Genie appears. Enter the Biller Genie merchant portal credentials and click “Log In”.
Step 10
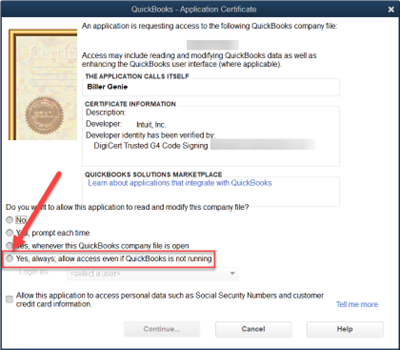
Once successfully logged in, QuickBooks will prompt an Application Certificate dialog box. Under “Do you want to allow this application to read and modify this company file?” check the last option “Yes, always; allow access even if QuickBooks is not running”.
Step 11
After checking the box in step 10, a “Biller Genie – Authorization” dialog box will open. Click yes.

Step 12
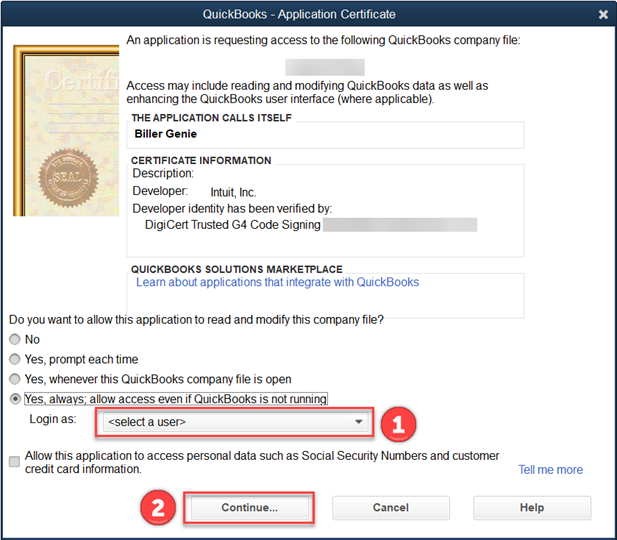
After clicking yes in step 11, the “Application Certificate” dialog box will be open again. Click the drop down under “Login as” and choose the admin user. Then click continue.
Step 13
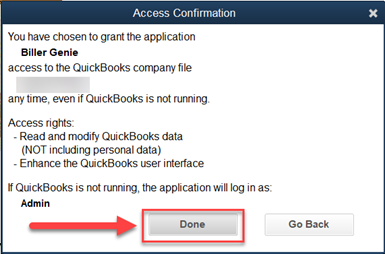
After clicking continue in step 12, a “Access Confirmation” dialog box will open. Click done.
Step 14
After clicking done in step 13, the Biller Genie web app will load with the configured settings.

Note: It’s possible to timeout during the loading process. If that occurs, close the web apps window and restart from step 7.

Step 15
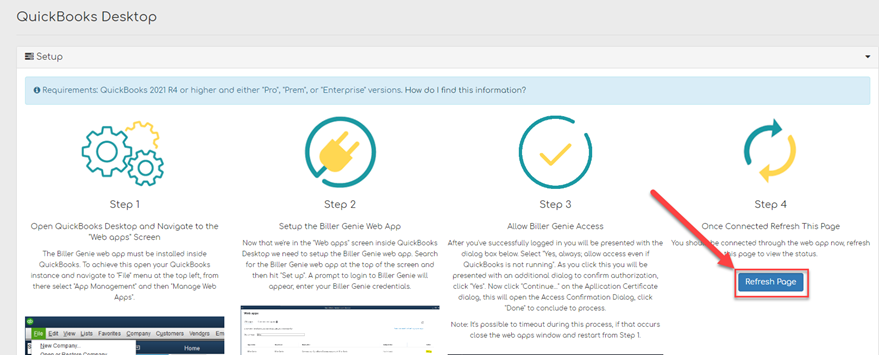
Go back to the Biller Genie merchant portal. The QuickBooks Desktop Add-on should still be on the screen. If it isn’t, click Add-ons on the left side menu, then choose QuickBooks Desktop. Click refresh on step 4.
Step 16
After clicking refresh in step 15, the screen will update, and Biller Genie will be attempting to sync with QuickBooks Desktop.
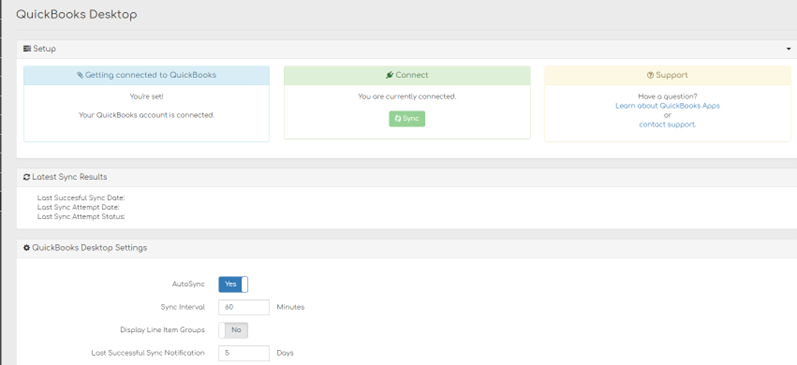
Step 17
If you have multiple Biller Genie accounts connecting to multiple company files stored on the same QuickBooks Desktop instance on the same computer, please continue to the next steps. If you have a single Biller Genie account connected to a single company file, you are finished.
Step 18
Return to the first Biller Genie merchant portal that has been connected and navigate to the new QuickBooks Desktop add-on. Click Add-ons on the left side menu and the click QuickBooks Desktop.
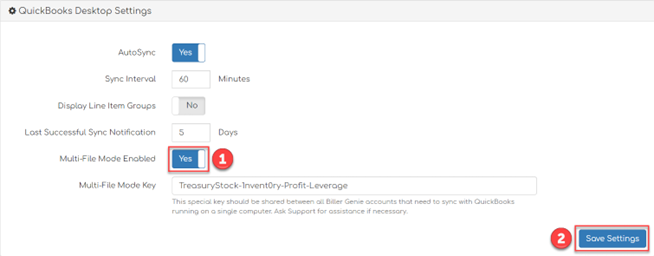
Step 19
Scroll down to the “QuickBooks Desktop Settings” section. To the right of the Multi-File Mode Enabled setting, click on the toggle to change it from No to Yes, then click Save Settings in the bottom right.
Step 20
When updating the additional Biller Genie accounts and respective company files stored on the same computer, please repeat steps #2 - #27 for each account and file.
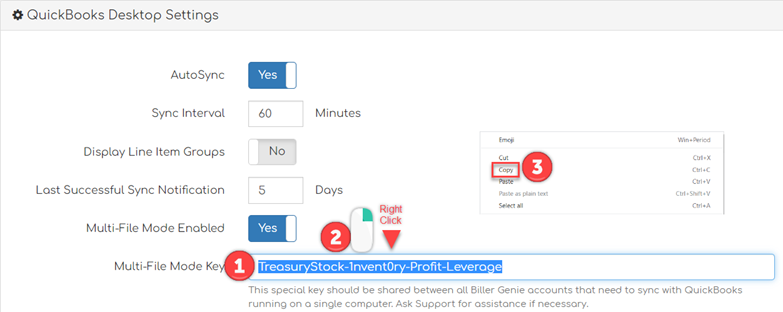
Step 21
Once step #27 is completed for each Biller Genie account and the QuickBooks Desktop company file for each has synced, return to the first Biller Genie account that was connected. Navigate to the new QuickBooks Desktop add-on. Scroll down to the “QuickBooks Desktop Settings” section. Highlight, right click, and copy the key to the right of the Multi-File Mode Key setting.
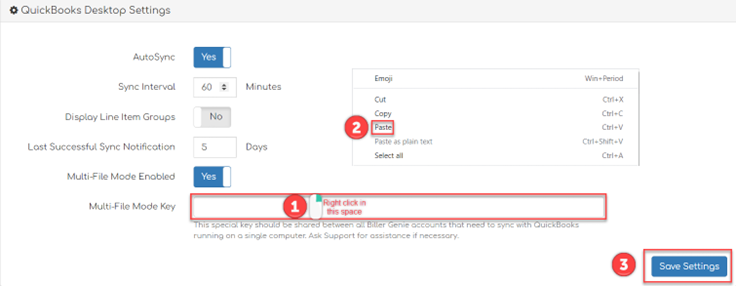
Step 22
Navigate to each of the other Biller Genie accounts and proceed to the QuickBooks Desktop add-on. Scroll down to the “QuickBooks Desktop Settings” section. Enable Multi-File Mode Enabled by toggling from No to Yes. Highlight and delete the existing Multi-File key. Then paste the copied key from the first connected Biller Genie account by right clicking in the empty Multi-File Key field then select paste. Click Save Settings in the bottom right to save the new key.
Step 23
After step #22 is completed for each connected Biller Genie account, the process is complete. It is critical to make sure that each of the Biller Genie accounts connected to different company files on the same QuickBooks Desktop instance on the same computer all have the same Multi-File Key. If they do not, the company files will not be able to autosync.
Appendix A
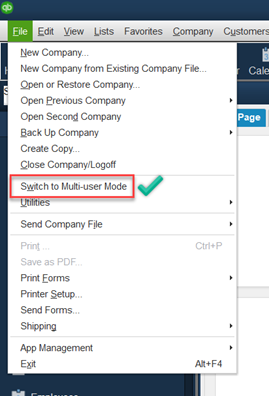
How to know QuickBooks Desktop is signed in as single-user mode.
- In QuickBooks Desktop, click the “File” menu in the upper left corner. Once the file menu opens mid-way down the menu it will show “Switch to Multi-user Mode”. This means the company file is signed in as single-user mode which is what is needed to get the Biller Genie web app set up.
How to switch from multi-user mode to single-user mode in QuickBooks Desktop.
- In QuickBooks Desktop, click the “File” menu in the upper left corner. Once the file menu opens mid-way down the menu click “Switch to Single-user Mode”.
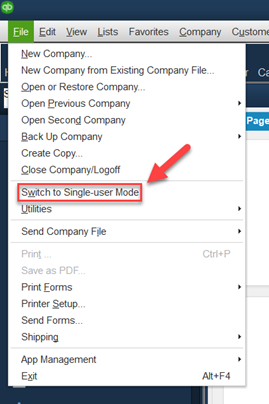
- Once the switch is competed, QuickBooks will acknowledge this with a dialogue box. Click ok and the company file will be signed in as single-user mode.