
Virtual Terminal Overview
The Biller Genie virtual terminal, included with our Credit Card Processing feature, allows for the processing of credit/debit card transactions independently of an invoice. It operates entirely online, eliminating the need for card readers or additional hardware, as card numbers can be manually inputted via the keyboard and securely sent through your payment gateway.
Syncing with Accounting Software
Transactions conducted through the virtual terminal do not automatically sync with your accounting software by default. However, you have the option to link the transaction to an invoice at a later time, which is useful if the invoice was not available at the time of payment but is generated at a later date. You can review the Attach Invoice to Transaction guide for help with this process.
Transactions Report
All transactions, whether they were made through the Virtual Terminal, or paid on an invoice by a customer, will appear in the All Transactions Report. Should you need to attach an independent transaction to an invoice, you can search the transaction in this report and then click Attach Invoice to find the open invoice that needs to be attached to the transaction. Once attached, the invoice will then close (if paid in full) and sync back to your accounting software.
Testing and Errors
Invoice payments and Virtual Terminal transactions both use the same gateway and merchant service provider so the Virtual Terminal can be used to test or troubleshoot connections and errors. When setting up your Biller Genie account for the first time, or when a change is made to any of your payment service providers, the Virtual Terminal can be used to process a test transaction to ensure everything is working properly.
Create a Payment Schedule
The Virtual Terminal can also be used to set up recurring payment schedules, so you can automatically bill a customer. Please use the Create a Payment Schedule guide for instructions.
Using the Virtual Terminal
The Virtual Terminal can be accessed in two different ways.
Option 1: Open the Virtual Terminal and fill in the customer info
Option 2: Search for the customer you wish to charge and then initiate a transaction (this will populate their info)
Option 1: Accessing the Virtual Terminal directly
Step 1: Open Menu
In the Biller Genie portal, click Add-ons
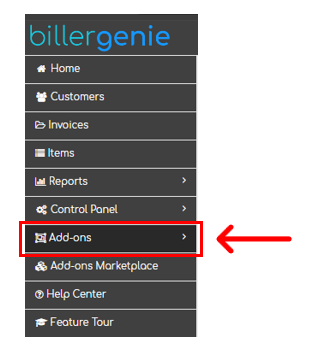
Step 2: Select Add-on
Click the Virtual Terminal button

Step 3: Complete form
Enter the customer information.
Note: Only 4 fields are required to process a transaction:
- Customer Name
- Card number
- Expiration Date
- Amount (Total amount, including all taxes, and fees)
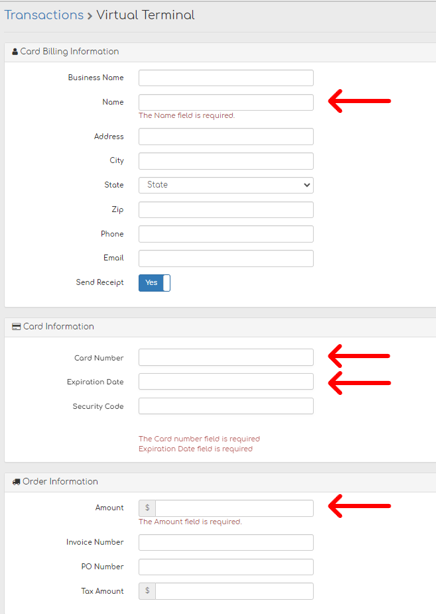
Step 4: Finalize
Click Create Transaction to charge the card

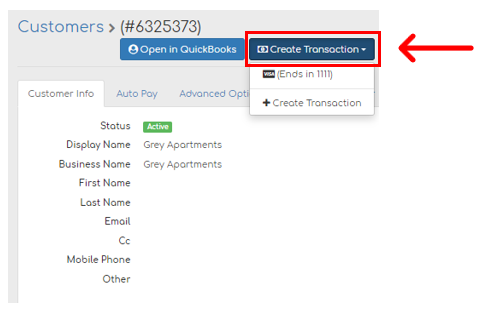
Option 2: Accessing the Virtual Terminal through a Customer record
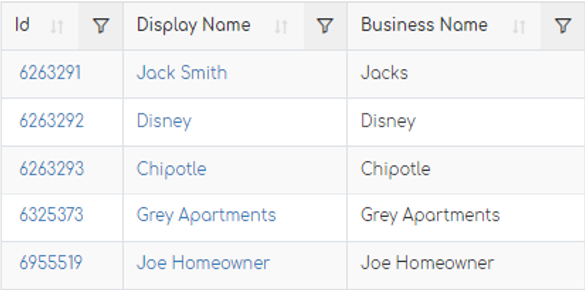
Step 1: Open the Customer list
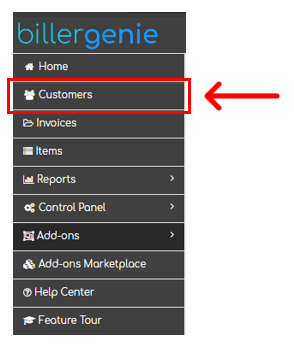
Step 2: Select Customer
Click ID or Display Name to select a customer
Step 3: Initiate Transaction
Within the customer record, click Create Transaction and either select a previously saved card or click + Create Transaction to enter a new card number
Step 4: Complete transaction
This option will pre-populate any available customer info from their profile
If you selected a saved payment method, that will pre-populate as well and you will only need to enter an amount.
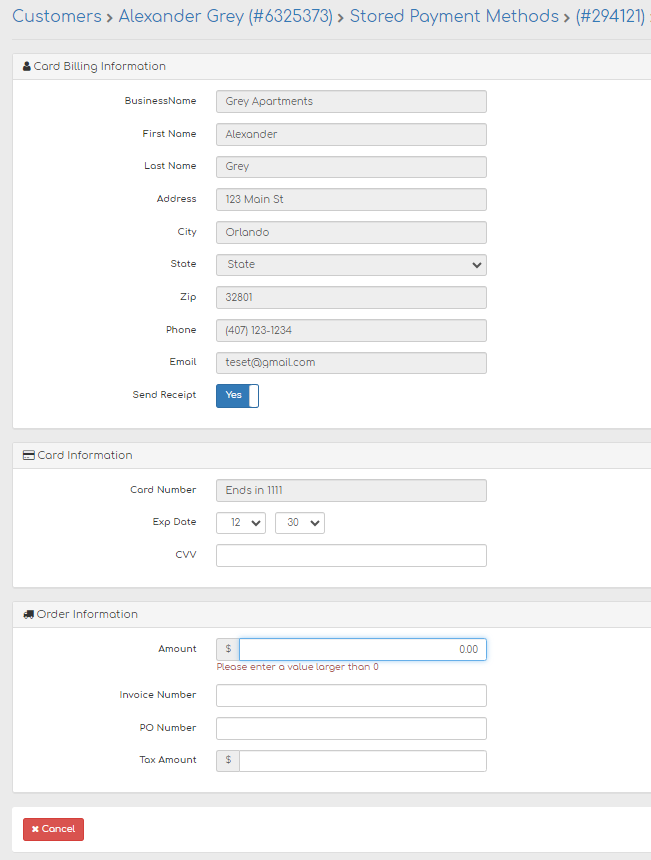
Step 5:
Click Create Transaction
If approved, the transaction will appear in your Transactions Report