How To Create An Invoice
Table of Contents
You can create invoices directly from a customer’s invoice screen or from the “Create an Invoice” add-on. This guide will walk through creating an invoice directly through the add-on. When an invoice is created through the customer’s invoice screen, the customer is pre-selected for the new invoice.
Step 1
Login into your Biller Genie Merchant Portal.
Step 2
Click Add-ons in the left side menu, then click Create an Invoice.
If you don't see this Add-on, navigate to the Add-ons Marketplace to install it
Step 3
The New Invoice screen opens. You can update which columns are available on the new invoice from the invoice default settings in the control panel. If multiple columns are being used, the screen size may require scrolling to view all item details.
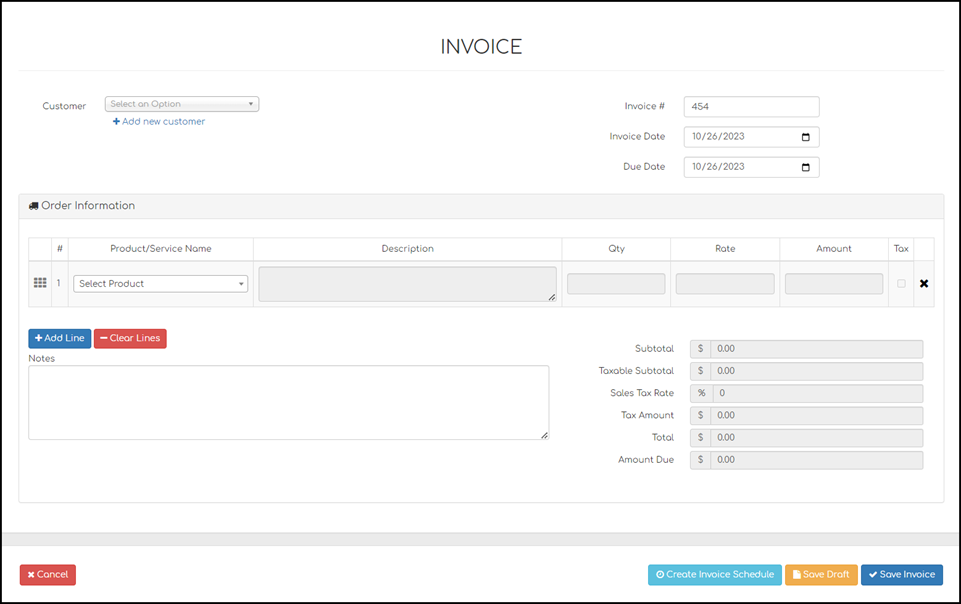
Important
If there is accounting software connected to Biller Genie, any invoices created in Biller Genie will not sync back to the accounting software.
Step 4
Add a customer by clicking the drop-down in the customer field or click the +Add New Customer button below the field to quickly add a new customer that does not yet exist in Biller Genie.
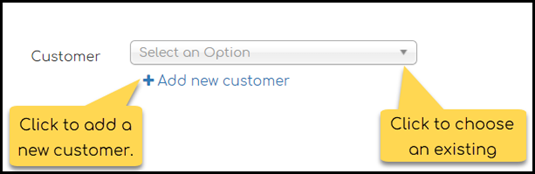
If the +Add New Customer button is clicked, it will open the Add Customer screen. Once the new customer is created, you will be taken back to the New Invoice screen with that customer selected.
Step 5
Now that the customer is selected, choose the invoice date, due date, and invoice number (if applicable). Biller Genie will automatically choose the next sequential invoice number.

Step 6
Click the drop-down arrow in the Product/Service Name field to choose an existing item. If the needed item does not exist, scroll down to the bottom of the drop-down and click the +Add New Item button to quickly add the item. Click the blue +Add Line button if more than one item needs to be added to the invoice. There is no limit as to how many line items can be added to an invoice. The red -Clear Lines button will remove any empty lines that are not going to be used.
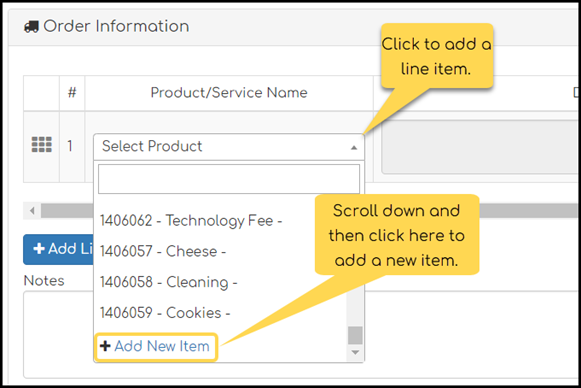
The +Add New Item button will open the Add Item screen. Once the new item is added, you will be taken back to the New Invoice screen to choose the new item from the list.
Step 7
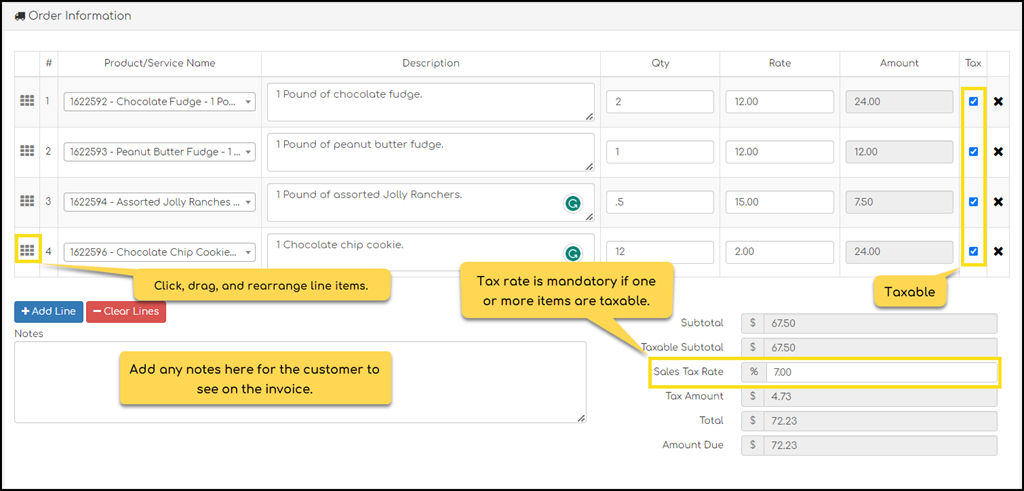
If there are any line items on the invoice that are marked as taxable, a tax rate will be required to finalize and save the invoice. You can drag items to reorganize them by clicking the nine-square button on the left side.
Step 8
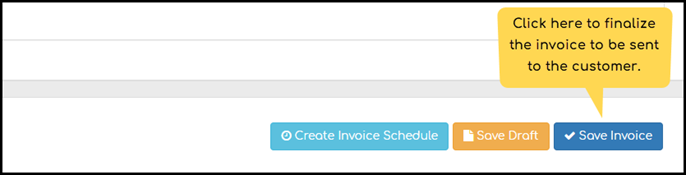
If everything on the invoice is correct, click the blue Save Invoice button in the bottom right corner to complete and finalize the invoice to go out to customers.
If Invoice Messenger is installed and configured, saving an invoice will automatically send it to the assigned customer based on the feature settings.
See Customer and Invoice Import Tool Playbook to upload customers in bulk.
A default tax rate can be set at the bottom of the screen but the tax rate on the invoice can always be adjusted for any invoices
where the default rate is not applicable.
