Contact Us

If you still have questions or prefer to get help directly from an agent, please submit a ticket.
We’ll get back to you as soon as possible.

  • Submit a Ticket
  • Home
  • Integrations
  • AccountingSuite

Syncing with AccountingSuite

Written by Thomas Aronica

Updated at May 15th, 2023

Contact Us

If you still have questions or prefer to get help directly from an agent, please submit a request.
We’ll get back to you as soon as possible.

Please fill out the contact form below and we will reply as soon as possible.

  • Integrations
    AccountingSuite QuickBooks Online QuickBooks Desktop Theramanager Xero
  • Invoices
    Managing Invoices Parent & Sub Customer Customers
  • Features
    Customer Portal Dashboard Invoice Messenger Late Fees Paper Mail Payment Plans Reminders Technology Fees Frequently Asked Questions Automatic Batch Reconciliation Getting Started
  • Payments
    ACH Schedules & Recurring Billing Stored Cards Transactions Deposits Credit Card Processing
  • Reports
    Email Reminders Customer Sync History
  • Settings
    Branding Customer Settings General Settings User Accounts Billing
+ More

Table of Contents

This article will guide you on how to establish the sync between Biller Genie and AccountingSuite. Step 1 Step 2 Step 3 Step 4 Step 6 Step 7 Step 8 Step 9 Step 10

This article will guide you on how to establish the sync between Biller Genie and AccountingSuite.

For Biller Genie to pick up on your customer and invoice information, a sync has to be established with your AccountingSuite account.

Step 1

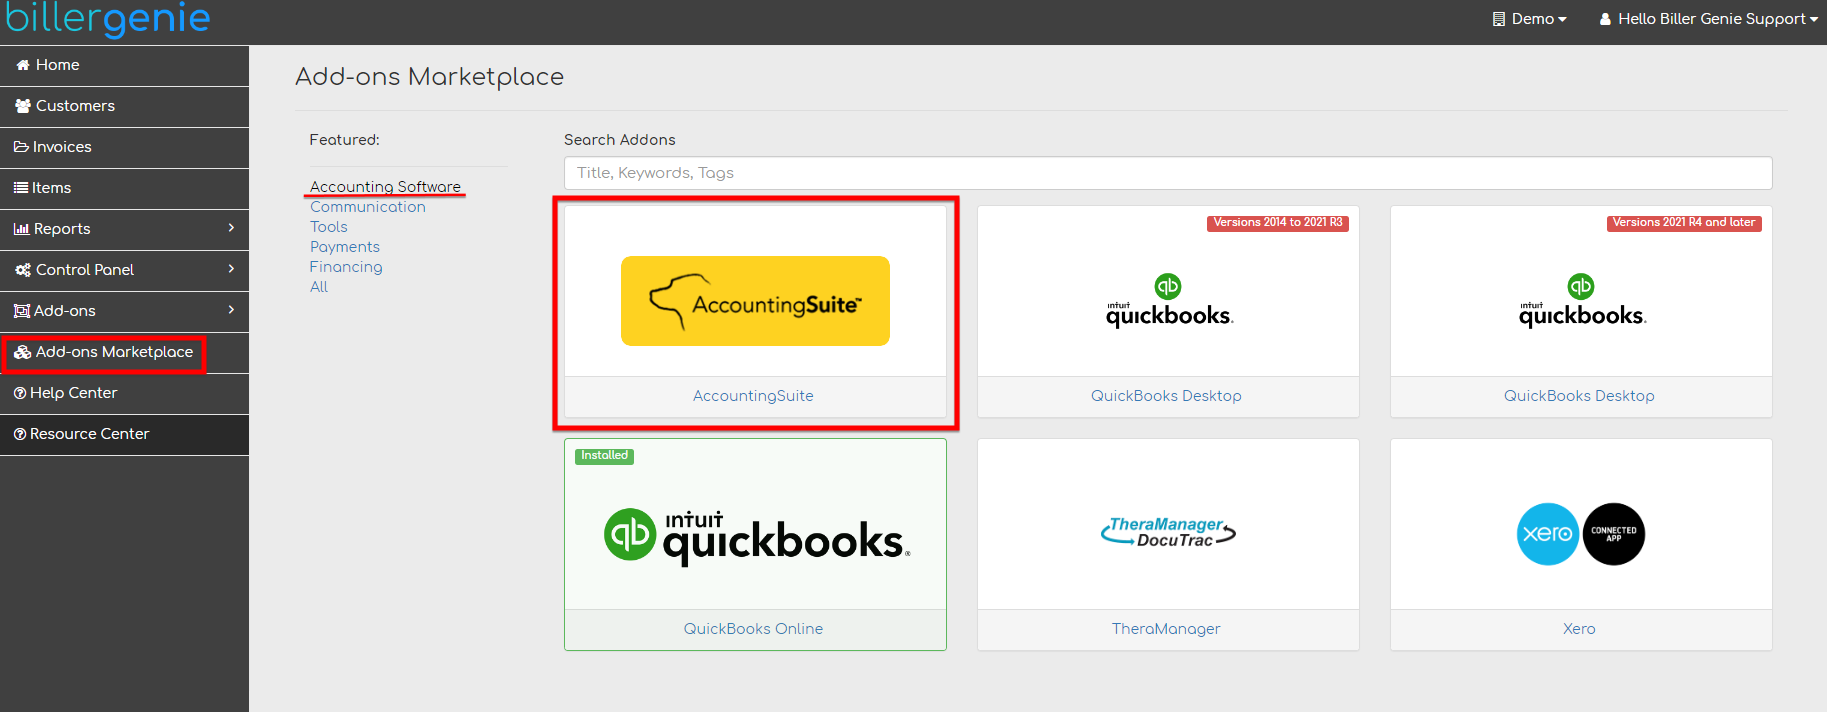
Click on Add-ons Marketplace and click on the Accounting Software tab to help locate the AccountingSuite tile. 

Step 2

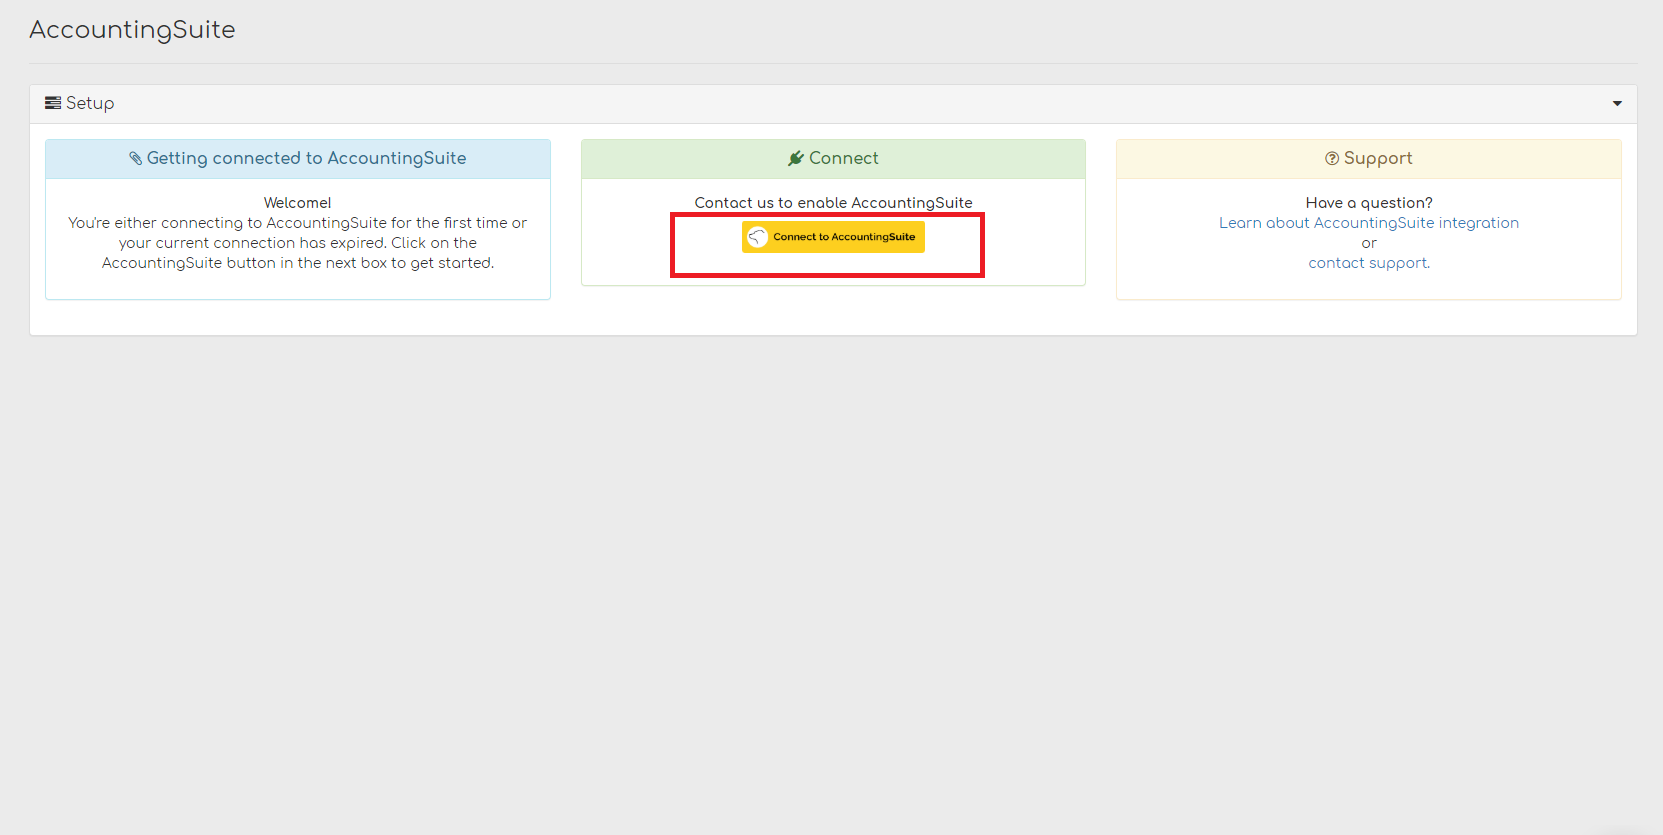
Install the add-on and click the Connect to AccountingSuite button.

Step 3

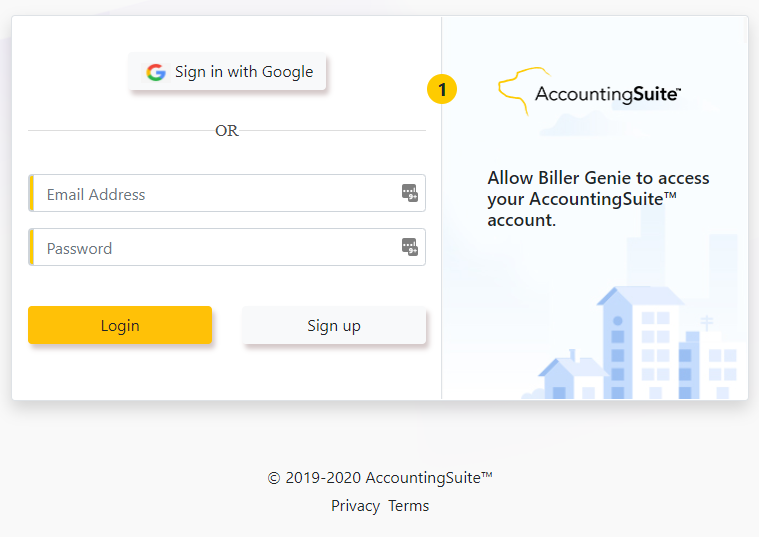
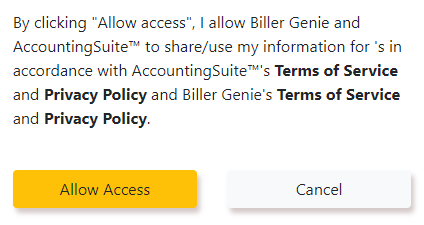
Log in to AccountingSuite and grant access to Biller Genie.

Step 4

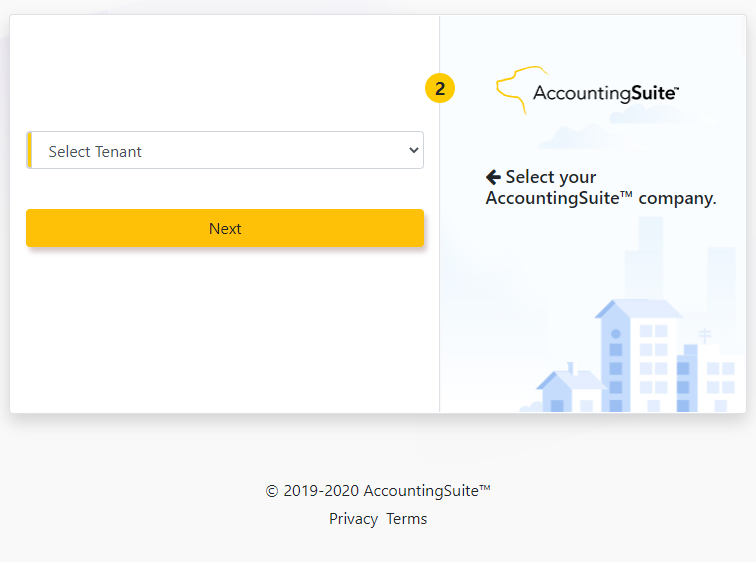
Select the AccountingSuite tenant you wish to connect with and then click Next.

Step 6

Click the Allow Access button to complete the connection.

Step 7

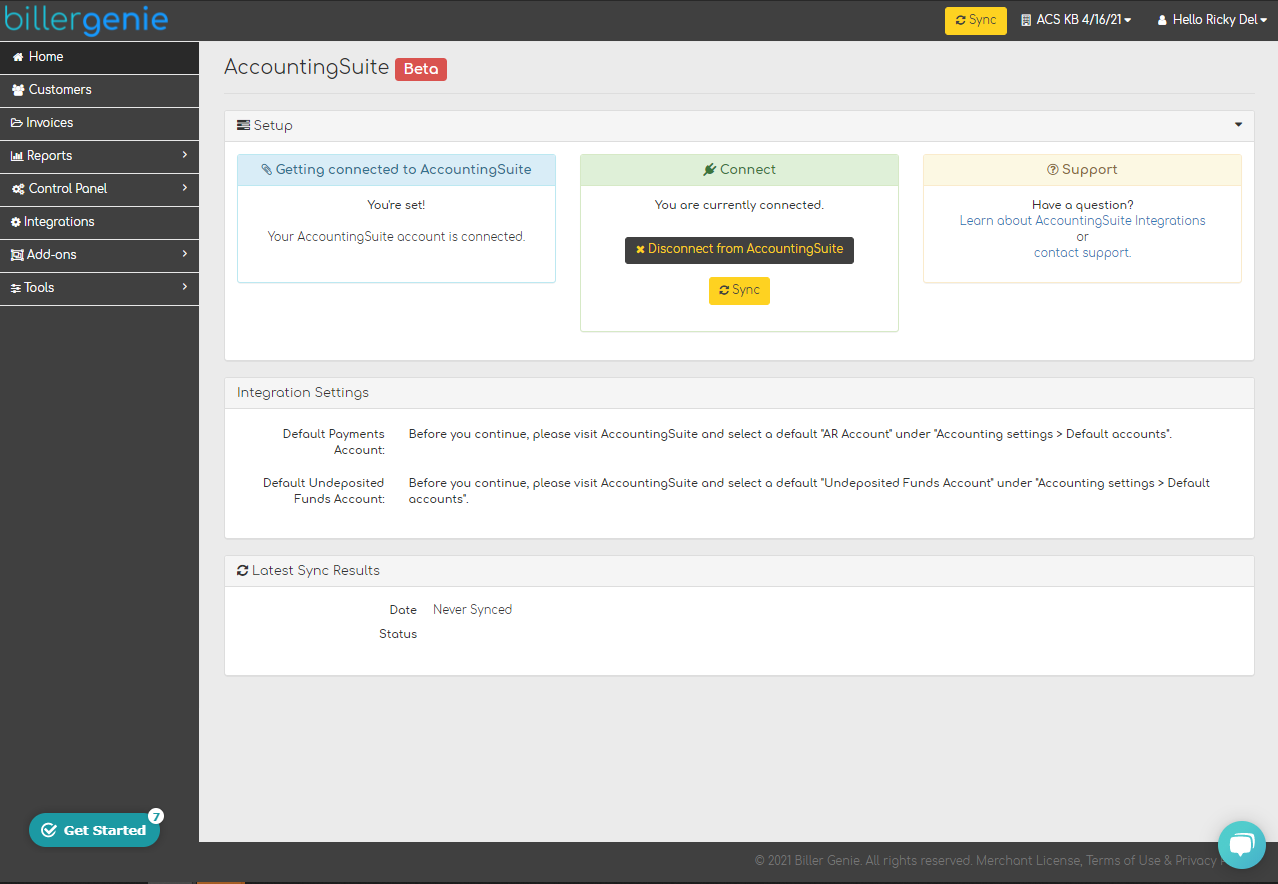
You will see that AccountingSuite account is now fully connected to Biller Genie.

There are just a few more steps to complete to ensure you get paid!

Step 8

The last step to complete is selecting the Default Payments Account and Default Undeposited Funds Account.

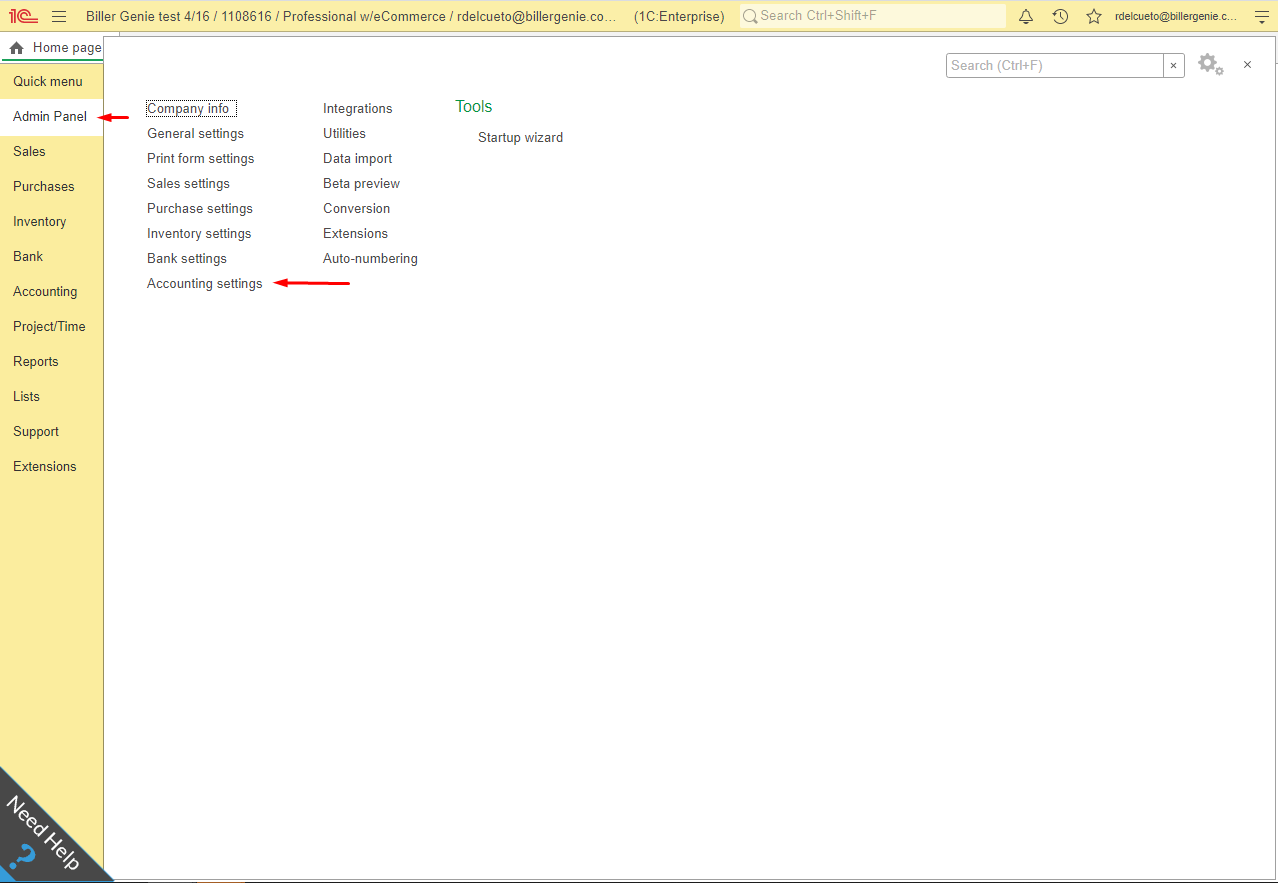
Login to your AccountingSuite company, go to Admin Panel, and select Account Settings.

Step 9

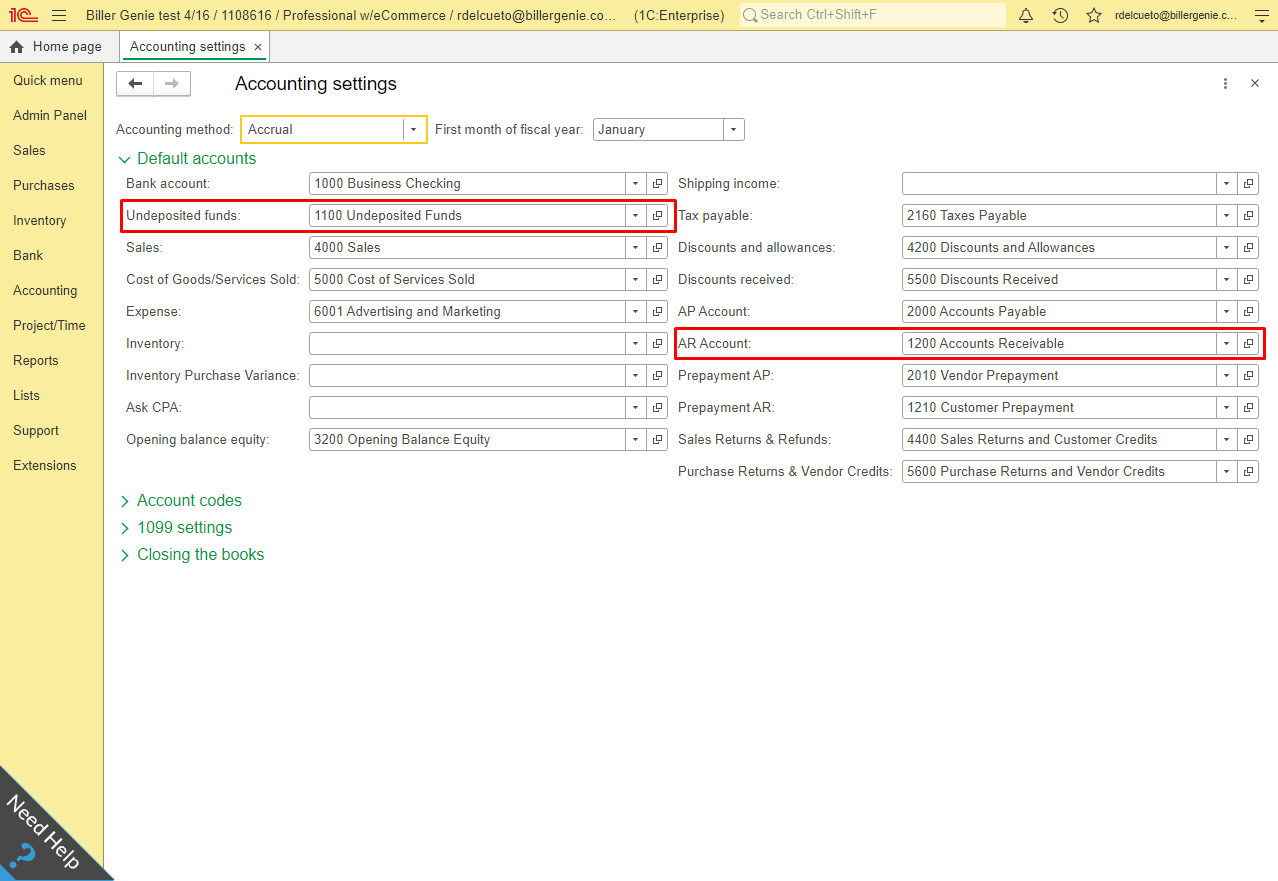
In Account Settings, select the default A/R account and undeposited funds account you want to connect to Biller Genie.

Step 10

Your Biller Genie integration is now complete!

synchronicity accounting sync

Was this article helpful?

Yes
No
Give feedback about this article

Related Articles

  • Accounting Suite Web Hooks
logo

Headquarters

3550 Biscyane Bivd
Suite 704
Miami, FL 33137

Software

  • Features
  • Integrations

Learning

  • Help Center
  • FAQ
  • Blog
  • Schedule a Demo

About Us

  • Contact Us
  • Our Story
  • Team
  • News
  • Careers

My Account

  • Login
  • Register
  • Submit a Ticket

Partners

  • Accountants/Bookkeepers
  • Financial Institutions
  • Franchises
  • Payment Providers
©2022 Biller Genie®. All Rights Reserved. Merchant License | Terms of Use | Privacy Policy
"Xero" and "Beautiful business" are trademarks of Xero Limited. | Intuit, QuickBooks, TurboTax, Proconnect and Mint are registered trademarks of Intuit Inc. | AccountingSuite is a registered trademark of YellowLabs Software, LLC. I All other trademarks, service marks and other registered marks are the property of their respective owners.
Expand